Camp Spotlight: Shelton, CT


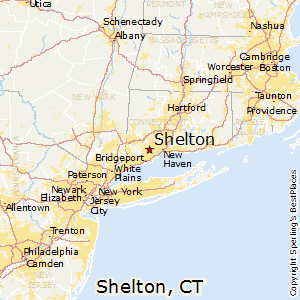
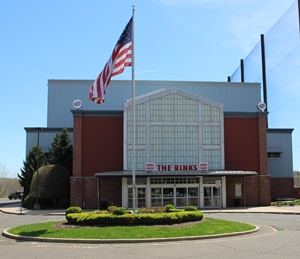
Shelton, Connecticut LocationWhere is Shelton, Connecticut?  What made you decide to do a camp there? Why Shelton?  These are common questions I get regarding this camp in a small town that most people have never heard of.  So let’s start with the where.  Shelton is located in southwestern Connecticut, approximately halfway between New York City and Hartford.  If you’re flying in, it’s just a little over an hour from LaGuardia or JFK airports, and there is a shuttle that will take you from either airport to our hotel for about $70 each way.  You don’t even need to rent a car.  As far as what made us decide to do a camp in this town, it’s really quite simple… they asked.  One day back in 2012 I received a call from the rink manager.  She had heard of our program, and said she was very interested in having us come to The Rinks at Shelton.  The rest is history.  We have been coming back every year since.  The rink staff is so friendly and accommodating.  This not only makes my life easier, but it makes your experience as a player that much better.  It’s the little things they do.  First and foremost, they provide a large locker room where we can dress and store gear in all The Rinks at Shelton is part of The Sports Center of Connecticutweekend.  That’s awesome, as it means no lugging gear to and from the rink.  And no keeping your gear in your hotel room!  We also get a very nice, spacious meeting room for all of our off ice activities.  Further, when nobody is on the ice after us, we can extend our session for those that want to spend a little more time practicing the skills they just learned.  By the way, it’s a very unique rink in that it’s a double decker, with one sheet on the ground floor, and another directly above it.  Pretty cool!
I love the town of Shelton.  It is a very quaint, picturesque New England town with rolling hills, winding tree-lined streets, and it’s located right on the Housatonic River.  After our first skate, we hold our Thursday evening “Break the Ice” social at The Pub on Howe, a local watering hole frequented by hockey players, where we have a small buffet of food to fill your belly.  Some players have even been known to wash it down with a beer or two.  It’s NHL playoff season, so on Friday night we like to find a place with plenty of TVs for an informal gathering.  On Saturday night we have our Camp Banquet at Vazzy’s of Shelton, an Italian restaurant with wonderful food.  We typically get the private room, with it’s own private bar.  Vazzy’s puts out quite a buffet, and nobody goes home hungry.  In fact, we typically send some of the local players home with some pretty serious doggy bags.

Our hotel is the Hampton Inn Shelton.  It’s clean, with spacious rooms and a solid hot breakfast buffet to get you fueled up before the morning skate.  It also has a nice pool and even a waterslide in case you bring the kids along.  The hotel is located within walking distance of a number of shops and restaurants, including Vazzy’s.  This means nobody staying at the hotel needs to drive after over-imbibing at the banquet.

One of my favorite things about this camp is the cast of characters that come year after year.  It’s a fun bunch, who never get tired of razzing me to provide them with free beer in the locker room.  But it usually seems to work the other way around.  They keep multiple coolers in the locker room stuffed with a variety of beers, and it’s hard to set foot in there without someone throwing you a cold one.  And 45 minutes or more after the Friday and Saturday afternoon skates, not only are most guys still in the locker room, but some of them have not yet bothered to remove their skates.  I’m guessing because that would require them to set their beer down.

Shelton is by no means a wild party town, yet due to the fun people and intimate social gatherings, this ends up being one of the more fun camps of the year.  If this sounds like an enjoyable hockey weekend to you, then I hope to see you in Shelton, CT!

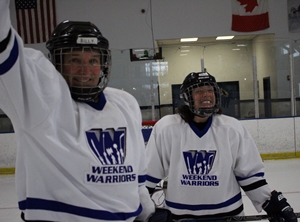
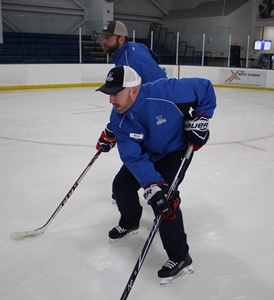
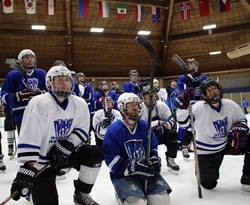
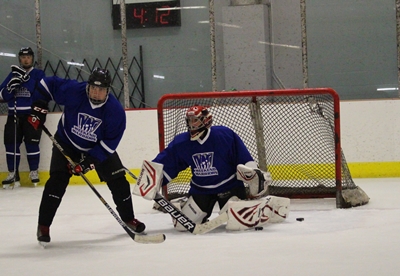
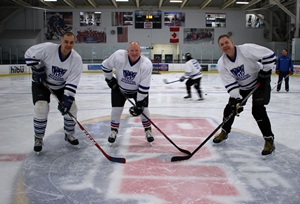
Below are some pictures from our Shelton camp.
 

Camp Spotlight: Pittsburgh

Our camp in Pittsburgh is the first on our schedule, and as such, provides us with some added fun and excitement, as my staff and I are always pumped for the first camp of the year.  The NHL playoffs are just underway at this point which means that there are multiple playoff games on TV each night.  It is hard not to enjoy the playoff atmosphere, especially given that the Penguins are perennial playoff participants (say that 3 times fast).
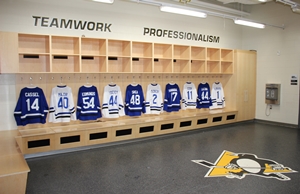
Our camp is held at the UPMC Lemieux Sports Complex.  This is a truly fantastic rink, and extremely well managed.  Everything about this place is first rate, which is not a big surprise.  Do you really think Mario would put his name on a building that wasn’t world class?  The rink takes great care of us.  Our off ice video review and chalk talks take place in the same room as the Penguins’ press conferences.  And the rink lets us use the “Penguins’ Elite Locker Room” (pictured here) for the entire weekend.  No, this is not the locker room that the Penguins use, but it’s probably nicer than any locker room you’ve dressed in before.  And since we get to keep it all weekend, there is no need to lug your gear home, or worse yet, have to dry it in your hotel room.  The rink also has really good food. And no, I’m not talking about nachos and “roller dogs”.  The menu at this place is created by the Penguins’ chef, and is simultaneously healthy, delicious and affordable.
The rink itself is situated in Cranberry Township, a short drive north of the city of Pittsburgh, and approximately 30 minutes from Pittsburgh International Airport.  It is very easy to reach by car from anywhere in the region, as it is located at the intersection of the Pennsylvania Turnpike (Interstate 76) and Interstate 79.  The area offers just about every amenity you could want, including lodging, restaurants and hockey equipment stores.

Our hotel is the Hyatt Place Pittsburgh/Cranberry, which is just around the corner from the rink.  With rooms for just $80/night, you might have some pretty low expectations.  But this place is really nice.  The rooms are spacious, clean and comfortable, and the delicious hot breakfast buffet is included.  It’s a great way to start your day before heading to the rink for the morning skate.

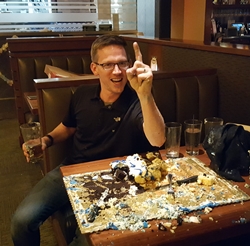
Let Them Eat CakeOur Thursday evening “Break the Ice” social takes place at the Sports Grille Cranberry.  It’s a great place to grab a bite and a beer after the first ice session, socialize with the coaches and other campers, and take in all the playoff games on their multitude of TVs.  On Friday night we usually pick another nearby watering hole for an informal gathering where we have some dinner and a beer or three, while watching playoff hockey, talking hockey and just generally being immersed in…you guessed it, hockey!  Then on Saturday night we have our camp banquet at Houlihan’s, where we enjoy a tasty meal, the wonderful company of our new found hockey friends, and just have a general good time.  Last year we were treated to one of the funniest things I’ve ever seen, as one of our Warriors took down an unsuspecting waiter in a cake eating contest.  Exactly what was that young waiter thinking when he dared to take on one of our Warriors?!
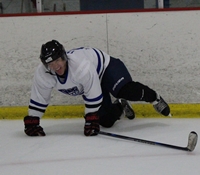
One question I get all the time about this camp is if the Penguins will be practicing, and if so, can we watch.  The answers are Yes and No respectively.  Yes, this is the practice facility for the Penguins, but when the playoffs begin, the practices are no longer open to the public.  I have, however, caught a few glimpses of the top secret practices.  It’s quite likely that they will be holding a press conference in OUR meeting room after said practice.  So you might very well run into some of the players and staff.

Our ice time is generally split with half of our sessions on each of the facility’s two great NHL sheets.  This of course means that you are practicing on the same ice as the Penguins, sometimes right after they get off.

I hope this gives you a better idea of what the Pittsburgh camp location is like.  If this sounds like the camp for you, then I hope to see you there!

How to Get the Most from Hockey Camp

Our camp season kicks off next week, and we are so excited to hit the road and spend time with our Warrior faithful, one city at a time.  We love putting these camps on, primarily because we get to hang out with so many great hockey people, who have have such an incredible passion for this game.  My staff and I get immense satisfaction from watching players progress from Thursday evening through Sunday morning.  The level of improvement can be dramatic.  We especially love it when a player has a “light bulb moment”, suddenly getting something he or she never did before.  And we can’t help but smile when we see our players having more fun than an adult should be allowed to have, while getting progressively better at this great game.  In order to facilitate this learning process, we have put together a few suggestions to ensure that you get the most from your camp experience.  These suggestions come from our staff as well as many of our players over the years.

1) Get yourself physically prepared for camp.  I don’t say this to scare anyone.  You don’t need to be in triathlon shape to attend camp.  Truth is, we have plenty of players show up in “marshmallow” shape, and still learn a lot at camp.  But your level of physical conditioning will affect your ability to give your full effort in every drill over the course of the weekend.  If you play 3 or 4 times per week or work out daily, you’re going to be in pretty good shape for the weekend.  But if you play once a week, and your other form of exercise involves the TV remote control, then you may want to up your exercise regimen in the weeks leading up to camp.  As coach Rob likes to say, our weekend of 12 hours on the ice is like an entire season of your beer league.  So get yourself off the couch and into the gym, and you’ll be better prepared to push yourself harder and experience greater improvement.

2) Set some goals.  On the Warrior Profile, we ask players about their learning goals for the weekend.  Some players leave it completely blank, while others make a list of 10 or more things they want to learn.  Our suggestion is that you think about 1 or 2 or possibly 3 things that you really want to improve.  Make these your focus.  Some may be covered as part of our regular curriculum.  However, you may have a goal that is not on the curriculum.  If this is the case, be sure to talk to a coach about your goal.  In some cases, these are things that you can get help with off the ice.  If so, there are lots of opportunities over the course of the weekend to discuss these matters with members of our staff.  But often they are things that need to be learned on the ice.  If this is the case, then arrange for a few minutes on the ice with one of the coaches.  The coach will find a few minutes to help you out on the ice when there is an opportunity.

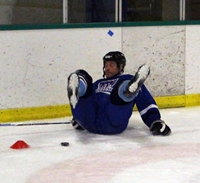
Fall_13) Get out of your comfort zone.  Our coaches are going to ask you to try some things on your skates that are not going to be easy.  Whether it’s committing to that outside edge or learning a new pivot, you are going to be challenged to try some things that push your current limits of balance.  But you’re here to get better, and you’re wearing a small fortune in protective gear.  So push yourself.  See how far you can commit to that edge.  If you fall, your gear will protect your body, and your ego will heal quickly, as you realize that many others are in the same situation.  Or maybe you can do something really well in one direction (e.g. stopping), but struggle in the other direction.  Use camp as an opportunity to improve the skill on your weak side.  The main idea is to push yourself a little beyond your comfort zone in order to maximize your level of improvement.

Fall_44) Don’t take yourself too seriously.  You’re going to fall, you’re going to miss a shot; simply put you’re going to struggle in some areas that aren’t comfortable to you. That is why you came to camp. It will be natural to get frustrated, however use that frustration to keep trying. Frustration can hinder your learning experience if you let it. Whatever you do, don’t hang your head.  Laugh it off, focus and get back to it. After all, we’re all in the same boat.

5)Fall_3 Come with an open mind –   While we don’t ask you to forget everything you’ve learned, it would be beneficial to come with an open mind. For many of us, a lot of our hockey knowledge comes from the “expert” on our local league team. By expert we mean the one that yells the loudest about how much they know about the game. While some of these things may be correct, often we pick up bad habits from these folks that actually hinder our game.  Our coaches have vast experience.  Is everything they say gospel?  Of course not.  There are different ways of doing things.  Sometimes it’s just a matter of trying things a different way.  Just because you’ve always done something a certain way does not mean it is the best way to do it.  So be open to new ideas.  You’d be surprised at how many people struggle to get something one way, but then are able to do it when a coach suggests an alternative way of doing essentially the same thing.

Fall_26) Go slow at first.  Speed does not equal effort.  Hockey is a fast game, and that is part of what makes it so exciting.  We all want to be able to duplicate what we see the pros do on TV.  But remember, those guys have been doing that almost every day since they were mini-mites.  We see too many players come to camp, learn a new skill, and try to execute it too fast.  It takes a while to train your brain to do it right.  So while the ultimate goal may be to do it fast, the most important thing is to do it right.  So whether it is a new stick handling move or a new skating stride, do it slowly and with good technique.  Once you get the proper technique down, the increased speed will come with repetition.

I hope you’ll keep these tips in mind when you come to camp.  We want to see you get the absolute most possible from your camp experience.  We will surround you with coaches who are knowledgeable, experienced and passionate about teaching you to be a better player.  Your job is to be the best sponge you can be, and take your game to the next level!

Going Away to Hockey Camp – Why It’s Better Than Going Local

IMG_8983As we get ready to hit the road for the start of our 15th season, I just wanted to share a few thoughts regarding the experience of going away to hockey camp.  I get a ton of inquiries from players wanting us to bring a camp to their hometown, and we are always looking at new locations.  But while having a camp at your local rink may sound ideal, for many of us, getting away to camp is a far better experience.  Look, having a camp at your local rink is certainly convenient, and is also the most economical way to gain all of the benefits of an intense weekend of learning and training with our knowledgeable and passionate staff.  But if you can swing it, getting away offers quite a number of advantages.

1) No Distractions.  When you attend camp locally, there are so many potential distractions that can prevent you from gaining the full benefit of the Weekend Warriors experience.  For some it’s the job.  For others, it’s the family or the dog.  The fact is, you haven’t really extracted yourself from everyday life.  Now this doesn’t apply to everyone.  There are those who attend at their home rink, and fully participate in all aspects of the camp.  Similarly, there are those that go away to camp, but get distracted by work or family matters.  You have to know yourself, and your personal situation.  I’m merely suggesting that you think about your situation, and if that extra buffer of going away to camp might be a better option for you. If you do attend camp locally, then consider setting some boundaries with work and family.  Maybe even tell the boss that you’re going away to hockey camp.  No need to let them know you’re still in town and tempt them any more than necessary.  Some local players have even been known to book a hotel room one or 2 nights, rather than commute home every night.

2) Total Immersion.  Players who go away to camp are, in general, more immersed in the experience.  This includes not just the on ice sessions, but all of the off ice portions of the camp as well, including chalk talks, video reviews and social events.  This total immersion yields a more enjoyable and satisfying experience.  Again, even if you’re local, try to experience this total immersion to get the most of your camp experience.  Think of the camp as an investment in yourself and your game.  In order to get the most return on your investment, you’ll want to participate in all aspects of the camp.

“Getting away for a weekend of nothing but hockey is great, and unlike playing in tournaments this weekend actually made me a better hockey player.” – Omni Adams

3) Camaraderie – “Camaraderie, Shamaraderie…That’s a bunch of BS.  I’m just here for the drills.”, you say.  Well I could not disagree more.  While the learning experience is the most compelling reason to attend hockey camp, do not underestimate the power of the people.  And as people, hockey players, particularly Weekend Warriors, are some of the best on this planet. We have a passion for this game, and when we get together to learn, play and talk about this game, there is a special energy that is pretty hard to duplicate.  Players come to camp and forge friendships with fellow payers, coaches and yours truly…friendships that will last for many years to come, if not a lifetime.  In my opinion, the camaraderie is the “special sauce” that makes the experience so memorable.
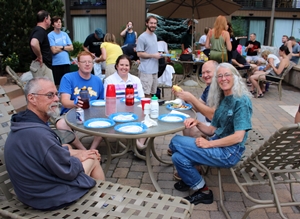
“Even after 25 years of playing, I learned so much that will definitely improve my game going forward. Also, it was a lot of fun. Great camaraderie with the coaches and other “campers”. Everyone is very supportive no matter the skill level. The whole experience is very well run and delivered as promised.” – Tom Kramer

4) It’s a Vacation – Make no mistake, you’re not going to be lying on the beach getting a tan (except maybe in Tahoe).  You’re going away to play a sport you love, and learn to play it better.  It’s hard work.  When you get back, your body might not feel like it was on vacation, but your mind and spirit will be recharged after such an exhilarating experience.
“WW was the ideal 4-day vacation.  I left camp with a smile on my face, feeling better about myself and my playing ability than I ever have in my entire life.  No matter what your skill level is, you leave WW camp better.  And the friendships you develop off the ice are for a lifetime.” – Pat Mauceri

Some Common Excuses Debunked

I would like to address some common reasons people use to not go away to hockey camp.

It’s Too Expensive – I’m not going to mislead you.  Going away to camp is definitely more expensive than attending at your local rink.  But assuming there is no flying involved, it’s not as expensive as you may think. It can be a nice little road trip.  Gas is cheap these days, and you don’t need to eat prime rib every night. We even provide dinner on Saturday, and many of our hotels include breakfast. The biggest additional expense is the hotel, and we do our best to negotiate a good deal for our players at each location.  But the best way to minimize your hotel expense is to split the cost of a room.  So bring a buddy along, and if that’s not an option, then send us an e-mail and ask us to help connect you with a roommate.  We’ll do our best to help you out.

I Can’t Fly with My Hockey Gear – Many people assume that since the airlines and TSA have made flying less fun than a colonoscopy, that it would be prohibitively expensive to fly with hockey gear.  Well, the truth is, it’s not as bad as you may think.  Most airlines have policies that treat sports bags with a special set of rules.  So even though it’s a bigger bag, you can check it for the cost of a regular bag.  And get this, your sticks count as part of the bag.  And if you fly Southwest, your bags fly free.  Also consider that you don’t need to pack your tux, as our camp social events are totally casual.  You can even stick your clothes in your hockey bag or your carry on so you don’t need to check 2 bags.  For more details, see our page on Flying with Hockey Gear.  We have a lot of fun destinations, so don’t limit yourself to driving distance if there’s a more distant camp that intrigues you.

I Don’t Have Anyone To Go With Me – You want to go, but you can’t talk any of your hockey buddies into going with you?  That’s pretty common.  Don’t be deterred.  Weekend Warriors are fun and friendly people, and the atmosphere at our camps is so conducive to making friends.  Before we take the ice on Thursday, at our orientation meeting, we all get acquainted as we introduce ourselves to one another.  Then immediately after the first ice session, we head out for a beer and a bite to eat in our “Break the Ice” Social.  By the time you get to the locker room on Friday morning, your new friends will be waiting to chirp you in the locker room.

“The combination of 12 hours of ice time, superior coaching, skill progressions, video analysis, and social events was outstanding. I didn’t know how it would be attending the camp on my own, but everyone made me feel welcome and I learned more than I have at any other camp. The coaching staff was knowledgeable and professional.” – Lynda Ransdell

Going away to hockey camp is not for everyone.  For many it’s just a matter of budget.  If your budget allows, then I would highly recommend taking your game on the road.  It will be a vacation you won’t soon forget.  But if getting away is out of reach for financial or other reasons, then of course we want you to attend locally if there is a location within commuting distance of your home.  Just remember to avoid distractions and immerse yourself in the camp in order to maximize your learning and enjoyment.

Defensive Concepts – 3 Simple Tactics Anyone Can Use to Play Better Defense

Prologue:  You play in a beer league, and you want to get better, so you go to hockey camp.  You learn all kinds of cool new stuff that you never knew before.  You leave camp so excited, and you can’t wait to go home and tell all your teammates.  You’re going to teach them all of these wonderful new concepts you learned from our amazing coaches.  You show up in the locker room 30 minutes before your next game. All of the guys are there extra early.  You bring a whiteboard and marker, and begin to explain all that you learned.  Your teammates listen intently, absorbing all of your newly acquired knowledge.  Then it’s game time.  You hit the ice, and your teammates are like entirely new players, executing everything you’ve taught them to perfection.  You win the game against an opponent you’ve never beaten before, and your teammates carry you off the ice on their shoulders.  You’re a hero!

Hey buddy, it’s nice to have dreams, but seriously, if that sounds anything like your team, then sign me up to play with you guys next season.  The truth is that you are going to learn a lot at hockey camp, and you will leave a much better player.  But the fantasy ends there.  There’s no way the knuckleheads in most locker rooms are going to listen, much less implement anything that you have learned.  So rather than teach you systems that the entire team needs to execute to pull off, we are going to teach you tactics that you can implement on your own.  I will share some of those tactics in this article.

Here are 3 tactics you can use to play better defense:

1) Defend the “Guts of the Ice”

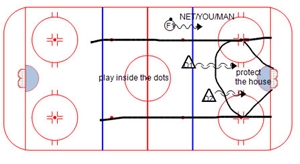
The “Guts of the Ice” are the area of the ice between the dots, for the entire length of the ice.  Of course, we’re not so worried about defending when we are in our attacking zone.  But as we retreat from our offensive blue line, back through the neutral zone and into our defensive zone, we want to keep the attacking player to the outside of the dots.  So we are playing inside the dots, and will use our stick and body position to steer the attacker to the outside.  As Coach Figsby likes to say, if they score from out there, we’ll get a new goalie.  Does this mean we never go into the corners or the outside?  No, of course not.  But first defend the guts.  Once you have established that you have support, then you can challenge along the boards or in the corners.  Another thing to think about, is that you always want to keep yourself between the attacker and your net.

2) One Hand On Your Stick

When we don’t have the puck, we are on defense.  And when we are on defense, we should have one hand on our stick at all times, unless we are actively engaged in a battle for the puck.  Too many players spend a majority of their time on the ice with two hands on their stick.  This may be because some coach in Mini mites yelled “Two hands on your stick!  Two hands on your stick!”, which scarred the player for life.  But when we hold our stick with just one hand, we gain several advantages.  First, we make ourselves bigger, making it more difficult for a player to get around us.  Second, we have the ability to sweep our stick and block up potential passing lanes.  Third, we have a greater reach should we decide to extend and make a poke check.  And most importantly, we can go stick on puck, also known as stick on stick or blade mirroring.  For a more detailed description of this tactic, see my previous blog article on Blade Mirroring.  Now if you are in a battle for a puck with an opponent and need to be strong on your stick, that is the time to have two hands on your stick.  The same is true if you are engaging with an opponent whose stick you wish to lift.

3) Steer players to their backhand

Even the best shooters in the NHL are less dangerous on their backhand than on their forehand.  The same will be true for players in your league.  I don’t know anyone who has a better backhand than forehand shot, and the same goes for passing as well as shooting.  Not to mention that their vision is more limited on the backhand.  So try to steer a player to his or her backhand.  How do you do this?  Well first, you’ll need to recognize whether she is a lefty or a righty.  It will take some practice, but after a while you will be able to recognize it at game speed.  So then how do we force them to their backhand?  Simple, we influence them with our stick and body position.  Use your stick and/or body to take away their forehand side, and give them more room to the backhand.

Now you ask, what if steering him to his backhand is toward the center of the ice?  Should I steer him to his forehand to the outside, or backhand to the middle?  That is a good question, and one that comes up at camp once in a while.  There is no hard and fast answer.  Hockey is a fluid game, and almost everything is situational.  With that said, my preference would be to keep the player from the center of the ice over shooting hand dominance.  It’s also easier, as you don’t have to figure out if the player is a lefty or righty as he is coming at you.

I hope these 3 tips will help you play better defense.  Of course, there are many more skills to learn when it comes to playing good defense.  Things like skating, passing, puck handling, communication and gap control to name a few.  We won’t attempt to cover too much in one article, but perhaps another day.  In the mean time, come to a camp, and we’ll teach you some of these skills on the ice as well as in the classroom.

Don’t Play Rod Hockey – Another Beer League Hockey Fallacy Debunked

Last month we debunked the notorious “Cover Your Point Fallacy”, providing cover for wingers who were being hounded by their teammates to stand next to the attacking team’s defensemen at the points in their defensive zone.  This month, our article will again focus primarily on the wingers (and the center), only this time at the other end of the ice.  Or more precisely, anywhere outside of the D zone.

As a winger, have you ever been told (while in the offensive zone) to “get to ‘your side’ of the ice” by one of your teammates?  What your teammate is saying is: you’re the right wing, so get to the right side of the ice, and as the logic follows, the left winger on the left side of the ice, and the center in the middle.  I don’t know where this one started.  Maybe Jack Adams coached the forwards of the 1927-28 Detroit Cougars to play like this?  Or maybe it has its roots from when we played rod hockey (AKA table hockey) as kids.  I know, I’m giving away my age.  For those of you that don’t know what I’m talking about because the only hockey game you played as a kid was on a video screen, see the photo at right.  But if we used old rod hockey games as the guide for positioning, then the forwards would never come back to the defensive zone!  Hey wait a minute…maybe we’re on to something.  Is that why my teammates never backcheck?

Seriously, this is not how the game is played.  And while we’re debunking sports myths, let me also point out that soccer players don’t spin about a chrome rod running through their hips.

F1, F2, F3 on Offense

OK, so you’re saying I don’t have to stay on my side of the ice AND I don’t have to pirouette around a steel rod?  That’s great.  So exactly what should I be doing?  Where should I be as the left wing, the right wing, or the center?  Well first off, let’s be clear that in this article we are talking about when we are on offense.  When we are under attack in our defensive zone, most coaches would advocate that you do maintain your side of the ice.  But here we are going to focus on when we are on offense, and more specifically after we have broken out of our zone.  Once we are rushing the puck up the ice, and/or set up and attacking in the offensive zone, the forwards should no longer think of themselves as left wing, right wing and center.  Rather they should be F1, F2 and F3.  In other words, you are free to go wherever it makes the most sense to be.

I know you’re still asking yourself, so where should I be?  The answer to that question can vary widely, and a full discussion is beyond the scope of this article. (We do offer a chalk talk at camp that explores this topic in greater depth.)  But there are some concepts that are pretty universal that I would like to discuss.

1) Go to the Net – After all, that’s where the goals are scored.  If we call the forward that crosses the blue line with the puck F1, then F2 would be the second forward into the offensive zone.  An effective tactic is to have F2 drive hard to the net (likely forcing at least one D-man to follow), and F3 (3rd forward into the zone) to fill in somewhere in the high slot (area between the face-off circles).  Of course all of this depends upon what F1 is doing.  Is he taking the puck to the net?  Taking it wide?  Maybe he turned and delayed?

2) Support Your Teammates – This is huge, and I would argue the most important concept of all.  You want to be in a position to help your teammates.  While this may seem obvious, it’s not as easy as it sounds.  So here are some things to consider:

 a) Make yourself available for a pass!  This seems like common sense, but is also not as easy as it sounds.  Some guys stand in front of the net, and yell at their teammate to pass it to them.  But they might be covered, sometimes by a guy they don’t see that is right behind them.  If so, you’re not really available.  Or maybe you’re not covered, but there are 2 or 3 defenders’ sticks between you and your teammate with the puck.  In this case, you may be open, but you’re still not really available.  Do you really think you’re teammate can thread the needle with a saucer pass through all those sticks?  Probably not on his best day with all the time in the world.  Chances are he is under pressure from one or more defenders, so the key is to be in position to be an easy passing option.

 b) Keep moving to open space.  Don’t stand still, as it’s highly unlikely you’re going to be open and available in one spot for very long.  So keep moving, looking for “soft areas”, which are little open areas of the ice without defenders.  Of course, you would love to find an open area where your teammate can feed you a pass for a scoring opportunity.  But failing that, be a relief valve.  Go to an area that he can pass you the puck, and then you can keep moving it around until you find an opportunity to attack the goal.

c) Talk – The pros do it constantly, and these are guys that skate with their head up.  It’s even more important when you’re playing at a level when most every puck carrier skates with his head down.  The vast majority of adult league players do not communicate well with their teammates.  You will be amazed how much a little communication will improve your team’s ability to move the puck and generate scoring opportunities.

Notice I have not said anything about which side of the ice you need to be on.  Once you break out across your own blue line, don’t think of yourself as a left wing, or a right wing or a center.  You are now 3 forwards moving up the ice, and you will go wherever you need to go to create an opportunity for your team to score.  Why make it easier for the defense by each player sticking to one particular area of the ice?  As a defender, I would love it if I knew the left winger was always going to stay on the left side.  It makes my job easier.

Speaking of defensemen, I don’t want to completely leave them out of this discussion of offense.  After all, when our team has the puck, we are all on offense.  And there’s nothing in the rule book that says a defenseman has to stay out at the point in the offensive zone.  In fact, the concepts above can apply to them as well, such that all 5 skaters are moving around the offensive zone trying to create scoring opportunities.  The one obvious caveat is that if a defenseman moves up, then one of the forwards needs to drop back and cover for him, to prevent a breakaway in the other direction.  This requires good communication and awareness.  But when all 5 skaters are involved in the offense, you not only have more fun, but you give yourselves an even better chance of scoring.

So be creative.  And by creative, I don’t mean dreaming up and diagramming plays.  This is not football where we start a new play, it lasts 5-7 seconds, and then we hold a conference to talk about our next play.  Hockey is a very fast moving game, and a big part of what makes it so fun is this dynamic nature.  So follow the concepts I have outlined above, and even if your individual skills have plateaued, you will find that you are having more fun playing the game.  This is because your team is passing more, creating more opportunities, and scoring more goals.  In short, you’re playing hockey!  And what is more fun than that?

I hope this article helps you become a better offensive hockey player, and simultaneously puts to rest the notion that players must stick to one area of the ice like a 2 dimensional figure in a 1970’s rod hockey game.  I also hope you’ll come to camp where we will not only explore topics like this in even greater detail, but spend an entire weekend improving your skating, your hockey skills and your overall understanding of the game in an adult atmosphere filled with fun and camaraderie.

The “Cover Your Point” Fallacy – All the Cover You Need to Silence Your Teammates

“COVER YOUR POINT!  COVER YOUR POINT!”  I can still hear the cries of many a clueless teammates echo through the cavernous arena.  We’ve all heard it.  That’s because by some form of divine intervention, the hockey powers of beer league, while they can’t seem to keep guys from playing down 3 levels below their skill level, do manage to get at least one hockey know-it-all on every single beer league team.  Just how exactly do they do that?  Sorry, I digress.

Here is the situation: The puck is in your end of the ice, and you just can’t seem to get it out.  Everyone is getting frustrated, and that’s when he starts his cry, most often from the bench:  “Cover Your Point!  Cover Your Point!”  He’s yelling at one or both of his wingers, and he wants them to skate out to the blue line and cover the opposing team’s D-men.  Well, Mr. Smarty-hockey-pants, I’ve been to a Weekend Warriors hockey camp, and I know better.

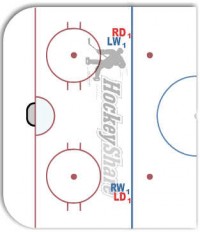
No, we are not suggesting that you let the opposing D have free rein to do whatever they want.  Far from it.  But we are saying that it is a big mistake to stand next to them and “guard” them like a cornerback guarding a wide receiver in football.  Why is that?  Doesn’t it make sense to “man up” and keep them from getting the puck?  While it may seem like good logic, I will explain some errors in that thinking and then propose a better alternative.

Guarding the Point ManMano y Mano a No-No

The thinking behind this strategy is that if each wing “guards” his point man, and prevents him from getting the puck, then those 2 point men will be effectively removed from the offense.  Well maybe so, but consider the following points:

1) The ice rink is a large surface, and there is nothing anchoring those D men in one spot.  All they have to do is slide 10 feet along the blue line, or 10 feet toward the net, getting themselves open for a quick pass and unobstructed shot.

2) In adult league hockey, wing is the position where we tend to “hide” our weaker skaters.  And the other team is normally going to have at least one strong skater, possibly two, playing D.  This means there is a good chance that at least one, if not both of our wings are going to be outmatched, and simply unable to adequately cover a better skater in this manner.

3) Even if both wingers do their job perfectly, this still creates a 3 on 3 down low.  If the opposing forwards are any good, they will be moving around trying to create little 2 on 1 situations, which can give them a scoring opportunity from the dangerous areas of the ice.

OK, so what is a better way to defend?

Defend the House

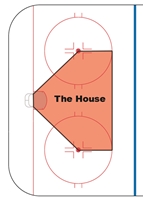
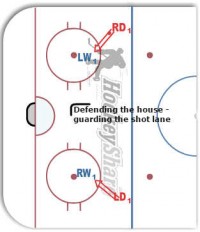
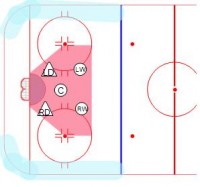
The cardinal rule in defensive hockey is to protect the house (see diagram), which is the most dangerous scoring area on the ice.  So what we teach at Weekend Warriors camps is for the wingers to come down lower, positioning themselves from the middle to the top of the circles.  But, you ask, doesn’t this leave the opposing D-men uncovered?  Yes and no.  Yes, they are more open for a pass from their teammates, but no, they are not uncovered.  Let’s explore a little further.

If you are the defending winger, and the D-man on your point gets a puck, you immediately skate out at him…IN THE SHOT LANE.  Even if you are a weaker skater defending a superstar, you are coming from the inside and expanding out.  You are already in the shot lane.  All you have to do is close the gap.  So you face him (your equipment offers the most protection from the front of your body) and skate toward him with your stick extended, blade on the ice.  If you do this, chances are he is not going to shoot, as the option won’t look very good to him.  And if he does, the most likely scenarios are that the puck goes up off your stick and into the corner or the netting, or better yet off your shin guard and out of the zone.  And since you are skating up ice and he is following through on his shot, you’ve got quite a head start on a potential breakaway.  The more likely scenario is that he is going to look to pass to one of his teammates.  Job well done.  If he does this, you can return to your position near the top of the circles.
Patience Grasshopper

So I’m going to anticipate an objection to this strategy.  Someone is going to say, “but then he can just pass it to his teammate, and they are going to play keep away from us.”  True, but so what?  If the other winger and the other players on your team are doing their job of defending from the inside out, then they have the puck on the perimeter.  Think about a basketball game where players are passing the ball around the perimeter looking for a chance to score.  They probably want to get it to the inside for a scoring opportunity, but if they can get a good shooter open on the perimeter, he might take a shot.  After all it’s worth 3 points, and oh yeah, there is no goalie.  Well, there are no 3 point shots in hockey, and as Coach Kevin (Figsby) is fond of saying, “If they score from out there, we are going to get a new goalie.”  Put another way, your goalie should stop all shots from the perimeter, provided they are not deflected in close.  So let them have it out there.  Make them pass it around the perimeter. Be patient and be disciplined.  Think of it this way…every time they make a pass, it is an opportunity for a mistake.  And you can increase the likelihood of a mistake by pressuring them quickly, and with an active stick.  When they make that mistake, pounce on it and you’re on the attack!

Can I go lower?

OK, so we have given the defensive wingers permission to go as low as the hash marks (middle of your defensive faceoff circle), but can they go lower?  You can watch an NHL game for an answer to this one.  There are times when there are 7, 8, 9 or even 10 guys (think playoff time) in the paint or low slot battling for the puck.  Why?  Because that’s where the goal is.  So yes, you can go down there to defend if there is a battle for the puck and you need to help out.  Just don’t get caught way down low if the D-man you are responsible for is way up high.  Otherwise you won’t be able to expand out at him quick enough to effectively influence his shot.  And don’t go down low in the corners unless you are communicating a switch with one of your teammates.  Otherwise you are leaving a giant opening that can be exploited.  Your angle out of the corner is not one that will allow you to block or influence a shot on goal.

Defend from the Inside Out

Just to beat that horse one more time, let me point out that the concept we are really talking about here is more generically termed defending from the inside out.  In other words, start from the house, and defend out from there.  The goal is always in the same place, and they need to get the puck in there to score.

So the next time Mr. Smarty-hockey-pants tells you to Cover Your Point, you can explain to him that you are covering your point, just not the way he expects you to do it.  And if that’s not good enough for him, then hand him a Weekend Warriors brochure, and we’ll be happy to explain it to him over the course of a fun-filled weekend of hockey learning and camaraderie.

How Sharp Should My Skates Be? Blade Hollow Demystified

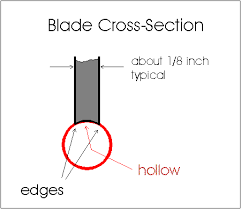
blade hollowWhat the heck is blade hollow?  And more importantly what does it have to do with the sharpness of my skates? Blade hollow is very important to your skating, yet I am amazed at how few people really understand the concept.  And I’m not just talking about newbies to the sport.  There are plenty of guys that have been playing their entire lives that don’t understand the concept.  In part this is due to the fact that it is counter-intuitive. It also doesn’t help that we (in North America), use fractions (of an inch) rather than decimals (in mm) to measure it.  Remind me again why I spent all that time in school learning the metric system?  Sorry, I digress.  Let’s start with some basic concepts.
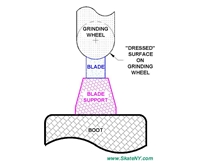
Skate Sharpening1) The bottom of your blade is not flat, but rather concave.  (See blade cross-section figure)  This creates a hollow which allows your skate to cut into the ice.  If you’ve ever put on a pair of skates out of the box (they don’t come sharpened), you’ve learned this the hard way.  No hollow = No bite = Sore butt.
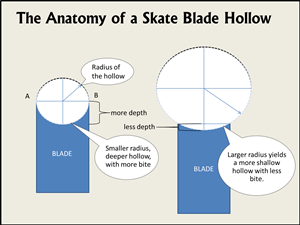
2) Blade hollow measurements refer to the radius of the circle that is cut into the blade by the grinding wheel of the skate sharpening machine.  The grinding wheel actually only grinds a small portion or arc of that circle into the blade.  (See grinding wheel figure)  Common hollows are 3/8″, 7/16″, 1/2″, 5/8″, 3/4″.

3) Now here is the part that is counter-intuitive:  The smaller the radius, the deeper the hollow.  I will repeat that.  The SMALLER the radius, the DEEPER the hollow.  Put another way, a smaller radius means a smaller circle.  And the smaller the circle, the deeper that circle will go into the blade.  Take a look at the pictures to get a visual of that concept.

4) OK, now that we are clear on that, you also need to know that the deeper the hollow, the more the skate will bite into the ice.  Given two pair of skates that have been freshly sharpened, the skates with the deeper hollow will be sharper.  You can actually feel the difference as you run your fingers (carefully and perpendicularly) across the blades.
So now you say “Thanks Rick, I’ve now earned a PhD in the geometry and physics of skate blades.  How is that going to help my hockey game?”  Fair enough.  While it’s great to have an understanding of blade hollow, the most important thing you need to know is what to tell the kid behind the counter when you hand him your skates.  Let’s address that next.  But don’t expect a definitive answer.

By this point you may have figured out that when you bring your skates in for sharpening, that it’s not simply enough to say “Sharpen my skates” as many players do.  If you do this, they will just sharpen to whatever hollow they cut for most people, or whatever the wheel is set up to cut.  And this may vary from shop to shop, or day to day.  In other words, you won’t get a consistent hollow from one sharpening to the next, and you’ll never figure out what works better for you.  Thus, you want to specify the hollow you would like.

So Which Hollow is Best for You?

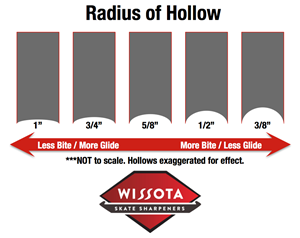
The answer is, it really depends.  There are so many variables:  How much do you weigh?  A lighter player may need a deeper hollow to bite into the ice, whereas that same hollow may produce too much bite for a heavier player.  What position do you play?  A deeper hollow is better for making quick, sharp turns.  But deeper hollows sacrifice glide.  Thus, forwards tend to like deeper hollows than defensemen.  And goalies generally use very shallow hollows, although even that is changing.  How hard is the ice?  For hard ice, you want more bite (deeper hollow), but that same hollow may cause too much bite on soft ice.  So you may need to change your hollow from rink to rink, and by the season as ice conditions are generally softer in the summer.
So there is no definitive answer to the question of “Which hollow is best for me?”  You really need to experiment.  I am 5′ 8″ (in thick socks) and 175 lbs., and I like a 1/2″ hollow.  If you are under 200 lbs., this is probably a good starting point for hollow.  If you weigh well over 200 lbs., try starting at a 5/8″ hollow.  Then experiment from there.  Do you feel like you’re digging in too much?  Or is your skate chattering when you stop?  Do you not feel like you have much glide?  If you feel any of these conditions, then go for a shallower hollow.  On the other hand, if you “blow a tire” (skates slip out and you fall) every time you make a tight turn, then you probably need to go deeper with the hollow.

The diagram from Wissota shows some typical hollows, and even though it is not to scale, it is great for illustrating the concept of deep vs. shallow hollows.  However, keep in mind that those are not the only options.  For instance, if 1/2″ feels too shallow, you don’t have to go right to 3/8″.  You can ask for a 7/16″ hollow, which is actually a pretty popular hollow.

I hope this helps you understand the concept of hollow, and more importantly, helps you choose a hollow that makes you a better skater, and thus a better player.

-Rick Parisi, CEW, Weekend Warriors Hockey

A Simple Way to Score More Goals

Everyone wants to score more goals.  Sure you can work on your wrist shot until your shoulder pops out of the socket or practice your toe drag until your hands bleed.  Those skills will make you a better goal scorer.  But here is a real simple way to score more goals.  However, there are two caveats:  First, notice that I said simple, not easy.  Second, while it is sure to yield more goals for your team, it may not improve your goal total.  I’ve just given you two clues.  Have you guessed it?  Are you hanging on my every word in suspense?  Well I’m no Stephen King, so I’ll just tell you…Screen the Goalie!  You’re disappointed aren’t you?  It’s like you just read that tease on the web “click here to learn this simple way to lose belly fat”, and it brought you to some scam.  Well, this is no scam.  It works.  Given how well it works, I am amazed at how few adult league players or teams do this.  But as I said, it is simple, not necessarily easy.  Let’s explore.  How do we go about this?

Rule 1:  If you want to screen the goalie, play goalie.  Huh?  What does that mean?  Simple.  Pretend you are playing goalie.  This means standing in front of the net, not off to the side.  You position yourself such that you are in the best position to stop the puck.  But why would I do that if the object is for my team to score?  Because if you are properly positioned to stop the puck, then you are in all likelihood blocking the goalies ability to see the shot coming.

Rule 2: Stay out of the crease.  It is illegal to be in the crease before the puck is in the crease, so stay out.  If your team scores and you have your skates in the crease, the goal will likely not count.  Besides, when screening the goalie, the goalie is not going to be happy.  (In fact, I’m sure I’ll get a little hate mail from our goalies for this article.)  He may even try to shove, hack or trip you (which is why I said this was simple, not easy.)  So don’t give him any justification.

Rule 3:  Keep your shots low.  This one applies to your teammates.  It’s all about trust.  Nobody wants to stand in front of a head high clapper with player gear on.  It’s downright dangerous.  So keep your shots below the knees.  This also makes it tougher for the goalie to stop.

Rule 4:  Use wrist shots instead of slapshots.  Again, this is for the shooter, not the screener.  There are a number of reasons for this one.  First, you have more control, and are less likely to take your brave teammate’s head off.  But there is another reason that most players don’t consider.  If one of your teammates is taking the goalies eyes away by standing in front of him, he (the goalie) is at a severe disadvantage.  But if he hears the crack of your stick against the ice, his ears will tell him the shot is on it’s way.  Goalies are trained to drop into a butterfly when they hear this, and take away as much of the bottom of the net as possible.  So the wrist shot is silent, but can be so deadly.

Rule 4: Face the shooter.  Again, there is more than one reason why you should follow this rule.  First, by facing the shooter, you can move as necessary, shifting left to right if the puck is passed to a different potential shooting location.  Once the shot is on it’s way, your goal is going to be to not stop it.  Rather you may want to shift left or right to get out of the way of the shot, and with a little skill and practice, you may be able to deflect it into the goal.  Another reason is personal safety.  In case you didn’t notice in the locker room when you were getting dressed, your gear is designed to protect you from the front, and to a lesser extent from the sides and back.  You paid good money for that stuff, so let it protect you.

Rule 5:  Keep your stick on the ice.  By keeping your stick on the ice, you are better positioned to deflect the puck.  Also, you can offer it as a target to your shooter.  Angle it such that if the puck hits it, it changes the angle, making it more likely that it will go in.  Also, you get the goal!

Rule 6: Be prepared to pounce on any rebounds.  Even with a screen, it is still more likely than not that the shot will hit you or the goalie on it’s way toward the net.  That is often going to leave a rebound.  Be ready to pounce on that rebound.  You can even practice doing a quick 180 turn.  Be scrappy and be strong on your stick.

Rule 7: Wear a full cage.  There aren’t too many beer league teams where every player on the team can be trusted to keep his shot low, and it only takes one mistake or deflection to mess you up.  So if you’re one of those heroes that doesn’t wear a cage, then don’t volunteer to be the screener.  Remember, you’re playing for the Beer League Cup, not Lord Stanley’s Cup.  And while we’re on the subject of cups, you’re hopefully wearing one of those too!

Here are examples of an effective and ineffective screen.  These are from a drill that we ran at camp this past season.

Example 1 – An Effective Screen

This is an excellent example of an effective screen.  The offensive player is standing directly in front of the goalie.  This takes the goalies eyes away, and forces the goalie to look around the player in order to see. This takes the goalie out of position to block the shot.  Notice that the shooter is outside of the crease, with his body facing the shooter.  His stick is on the ice, ready to make a deflection.  But even if he doesn’t get his stick on the puck, there is a good chance it will score.


Ineffective ScreenExample 2 – An Ineffective Screen

In this example, the shooter is standing off to the side.  This is the most common mistake that players make.  He is facing the shooter with his stick on the ice, which is good, but he is not blocking the goalie’s vision at all.  He is a threat to deflect the puck, but with an unobstructed view, the goalie is likely to stop it.  Further, because he is next to the goalie rather than in front of the goalie, he is actually giving his teammate less net to shoot at.  (This is not evident from this photo because the camera angle is not the same as the shooter’s angle.)

Notice the clock in these 2 photos.  The photos were taken 1 minute apart.  It is the same group, doing the same drill.  It just goes to show that this stuff takes practice to execute properly.  I will confess that the player in the upper photo has been to camp before.

I’m confident if you follow these rules, your team will start scoring more goals.  Even the best goalie is going to have trouble making a save when he can’t see the puck coming.  It causes goalies to move out of position, lose their focus, and in some cases to lose their mind.  This last point emphasizes the need for bravery in executing the screen.  You have to trust your teammate to keep the puck low, and also be concerned what the goalie might do to counter your screen.  Don’t think for a minute that they don’t receive training in how to deal with a screening player.  I know our goalie coaches teach it to our goalies.  Hopefully the ref will be observant and call anything the goalie might do outside of the rules.  Double bonus score if you get the goalie to take a penalty!

Give it a try and let me know how it works for your team.

– Rick Parisi, CEW

Proper Warm Up for Adult League Players

Warm Up Do’s and Don’ts

Labor Day is now behind us, which means that most of you have or will soon be starting a new season.  In fact, mine just started last night.  So this seems like the perfect time to talk about your pre-game warm up.  And no, I don’t mean the beers that some of you consume (shudder) prior to taking the ice.  Save them for after the game, where they will be more refreshing and less guilt inducing.  And let’s face it, they don’t elevate your level of play… just perhaps your perception of it.  What I’m talking about is what you do to prepare your body for your game.  I have broken it down into two categories:  Do’s and Don’ts.

Let’s Start with the Don’ts, if for no other reason than they are more fun for me to write about.  First and foremost, don’t be that guy that goes out on the ice, put’s his spare stick and water bottle on the bench, and then immediately throws his leg up on the boards and tries to stretch it?  There is at least one guy like that on every beer league team.  I’ve never seen a woman do this, so maybe they are smart enough to know that you should never try to stretch a cold muscle.  If you feel the need to stretch a particular muscle, be sure to do so after your body is sufficiently warmed up.  After this knucklehead tries to stretch his cold muscle, what does he do next?  Clappers off the glass, of course.  After all, there are bound to be countless hot women in the stands just waiting to be impressed by the thunderous sound of your booming slapshot, right?  I mean I can’t think of a better place to meet a hot woman than a cold ice rink at 10:00 on a Tuesday night.  That’s where they all hang out!

OK, so I’ve had enough fun with our not so fictitious Knucklehead Warrior.  Truth is, that most of us, yours truly included, have used some of these methods to get ourselves prepared for a game.  So if we are to avoid the aforementioned in our warm up routine, what should we do?

Well the first consideration should be time.  In my current league, we get 5 minutes of warm-up time on the ice before we are signaled by the refs to start the game.  And 5 minutes is pretty generous.  Most leagues only give about 3 minutes.  So if that’s all the time we have, then how should we use it?

Step 1 – Warm Up Our Muscles

None of us are getting any younger, and the older our bodies get, the more important it is that we get properly warmed up so as to avoid injury.  So skate some laps to get your muscles warmed up.  While skating around, try to activate as many muscles as possible, including those of your upper body.  For those of you that have been to camp, you know this is the “active warm-up” that we do at the beginning of each ice session.  We skate around, and do things such as: Raise our hands above our head, then down to our toes, bring our knees up and then out (one leg at a time of course) as we skate, and more.

But given that we only have a few minutes of free ice time before a game, why not warm up before we take the ice?  We don’t need to use valuable ice time to get our muscles warm.  Why not try doing this Dynamic Warm-Up from ex-pro Gary Roberts.  It only takes about 4 minutes.  You can do this in the locker room just before getting dressed, or even while partially dressed.  Your teammates might think it a little odd at first, but they’ll get over it.  And some might even join you.  Then when you take the ice, you can use the entire 3 or 5 minutes to practice your mad skills.

Step 2 – Practice Our Skills

Once we are warmed up, then what skills should we work on? Well that’s entirely up to you.  But choose carefully, as you only have a precious few minutes.  I see some beer league teams try to mimic the pros and do some kind of drill where you have a line of guys in each corner of their team’s end of the ice, and they skate, pass and end with a shot on the goalie.  It may look cool to the 3 adoring fans in the stands, but I’m not a big proponent of these drills, mostly because you are wasting valuable warm-up time in line waiting for your turn.  Same goes for when guys make a semi-circular arc in front of the goalie, and then take turns shooting the puck.  Great for the goalie, not so much for the players.  Let one or two guys warm up the goalie. And remember, when you’re warming up the goalie, the object is not to practice your bar down snipe, it’s just to warm up the goalie.

Here are some suggestions for skills to practice in your warm-up:

Shooting: I made fun of those of us that like to take clappers off the glass, but there is nothing wrong with practicing your shot.  But if you want to do so, rather than seeing how hard you can hit the glass, why not work for a combination of speed and accuracy.  Most rinks have dasher board ads, so pick out a particular letter on one of those ads and try to hit it.  You can also work on your release, focusing on being quicker and/or more deceptive.

Passing: Why not get a teammate and work on your passing, both forehand and backhand.  Got that down? Try a little saucer pass.

Skating: I like to work on my skating.  And there are so many little skating skills you can practice: Inside edges, outside edges, tight turns, starts, stops with a crossover start for quick change of direction, pivots and transitions.  All of these can add to your agility on the ice during the game, and can make you a more effective player.  I am surprised by how many of these skating agility exercises I can get through in the few minutes before a game.  Just remember to work both sides of whatever skating maneuver you are trying.  Everyone has a strong side and a weak side for their stops, crossovers, pivots, transitions, etc.  Spend at least as much time, if not more, on your weak side as you do on your strong side.  Why?  Because in a game, you want to face the play, and make yourself available for passes from your teammates.  If you turn your back to your teammate because you can only pivot in one direction, and he makes a pass to you when your back is turned, the puck goes sailing past and it’s most likely a turnover.

Stick Handling: Practice it stationary and/or while on the move.  Incorporate it with your skating agility practice.

These are just some of the many things you can work on.  If you’ve been to camp, think of all of the drills that you went through over the course of your 12 hours on the ice.  This should give you a plethora of skills to work on during your warm-up. The main principles to keep in mind are to properly warm up your body and to use your limited warm up time wisely.

Good luck and have a great season!

– Rick Parisi, CEW